Disclosure: This post may contain affiliate links. If you buy through these links, we may earn a commission at no extra cost to you.
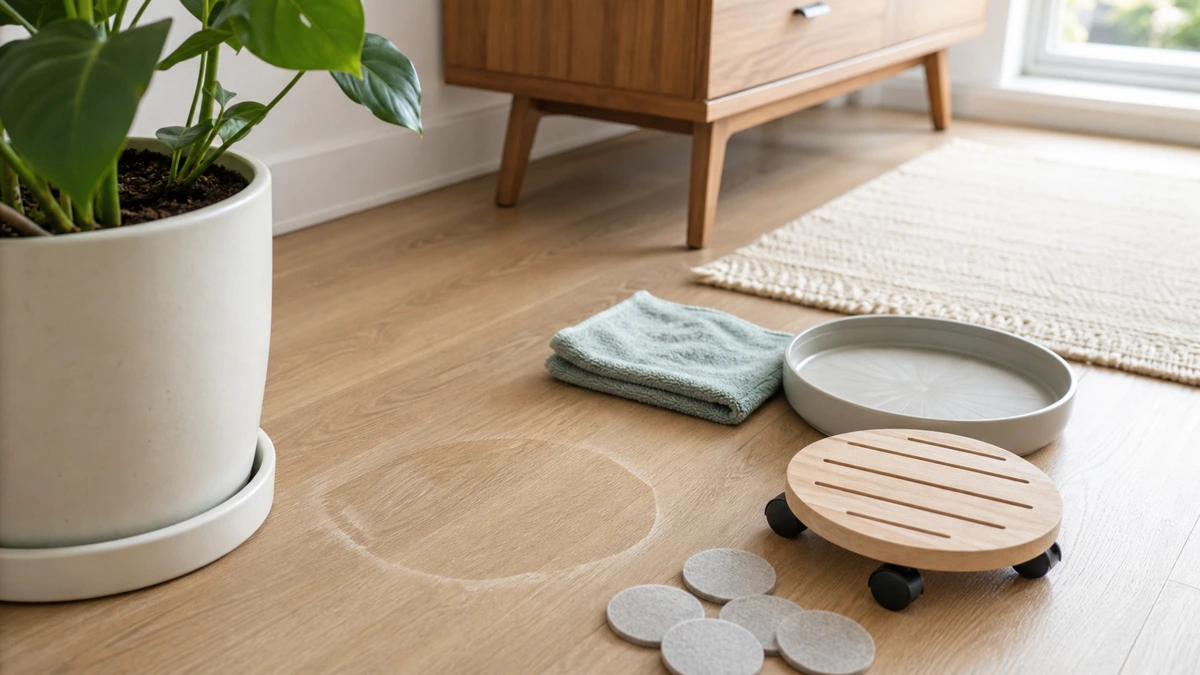
If a plant pot left a water stain on your wood floor, do not start with heat, sanding, vinegar, or heavy scrubbing. First, check whether the mark is a light surface haze, a dark moisture stain, or finish damage so you can avoid making the floor worse.
Related practical guides: cleaning a rug in a small apartment, small apartment humidity checks, move-out cleaning walkthrough.
If you rent, your stomach probably drops before you even touch the spot.
The first instinct is to fix it right now. You start mentally scanning the kitchen for vinegar, baking soda, a scrub sponge, or that old magic eraser under the sink. Then the internet offers you mayonnaise, toothpaste, hot irons, peroxide, sanding, and a dozen other “quick fixes” that all sound a little too confident.
Stop for a minute.
A plant-pot mark is not always a cleaning problem. Sometimes it is trapped moisture in the finish. Sometimes it is residue from hard water and fertilizer. Sometimes water has gone past the finish and into the floor material. Those are different problems, and treating them all with the same harsh trick is how a fixable mark becomes permanent damage.
This guide is about triage: what to check first, what not to scrub, when to stop DIY, and how to rebuild the plant corner so the same quiet leak does not happen again.
Quick answer
The short version
Do not pour cleaner onto the mark or start scrubbing. Move the plant, dry the area with a soft cloth, let the floor breathe for 24 hours, then decide whether you are looking at a light surface cloud, a dark stain, or swollen material.
- Best first fix: Blot with a clean microfiber cloth and leave the area uncovered so trapped moisture can evaporate.
- Check first: Look at the color and texture before choosing any cleaner. White haze, dark stain, and swollen seams need different responses.
- Skip first: Do not start with vinegar, bleach, peroxide, abrasive pads, magic erasers, toothpaste, mayonnaise, heat, sanding, or stain pens on an unknown floor finish.
First, figure out what kind of mark you have
The floor in a rental or small apartment might be solid hardwood, engineered wood, laminate, luxury vinyl plank, or a thin wood-look surface. That uncertainty matters because each material reacts differently to cleaner, heat, and scrubbing.
A white ring or cloudy patch
A pale, milky, or cloudy ring is usually the better scenario. It often means moisture is trapped in the top finish rather than deep in the wood itself.
This can happen when a cold ceramic pot creates condensation, a saucer overflows slightly, or a porous tray lets moisture sit against the floor for days. The plant looked harmless because there was no dramatic spill. The water simply had nowhere to evaporate.
A dark stain
A dark brown, gray, or black mark is more serious. It can mean water has breached the protective finish and reached the wood or core material beneath it.
At that point, a surface wipe may not do much. Be careful about turning the spot into a chemistry experiment; strong lighteners and acids can make the surrounding floor look worse even if they change the stain color.
Swelling, bubbling, peeling, or raised seams
Run your hand gently over the area. If the plank feels raised, cupped, wavy, soft, or bubbled, moisture may have entered the seams or softened the finish. Once inner material swells, a cleaner cannot shrink it back into shape.
What not to do first
The dangerous part is the damage people cause while trying to hide the mark quickly. Do not treat a rental floor like a test patch for every home remedy online.
Do not use abrasive sponges or magic erasers. These can behave like fine sandpaper, removing or dulling the finish around the mark and leaving a flat patch that catches the light.
Do not pour vinegar on the floor. Vinegar is acidic. On unknown wood finishes, coated surfaces, or laminate wear layers, it can dull, etch, or soften the surface.
Do not use bleach or hydrogen peroxide as a casual fix. These are lighteners, not gentle cleaners. If they penetrate, they can create an uneven bleached patch.
Do not try the mayonnaise or toothpaste trick first. Oil can leave residue, and toothpaste is still an abrasive. Both are a gamble when you do not know the finish.
Do not use high heat. A hot iron or hair dryer blast can damage polyurethane, laminate, vinyl plank, and thin veneers.
Do not sand or color over it in a panic. Spot-sanding and stain markers are easy to notice when the light hits the floor, especially in a rental.
The lowest-risk first steps
Start with the boring steps. They are boring because they are less likely to make the floor worse.
1. Move the plant and dry the area
Move the pot, saucer, stand, and anything else sitting on the spot. Use a clean microfiber cloth to blot moisture and wipe away loose dirt.
Microfiber is useful here because it absorbs water without acting like a scrub pad. For apartment cleaning, choose soft, washable, lint-free cloths.
Do not spray cleaner directly onto the floor yet. At this stage, the goal is to remove moisture, not add more liquid.
2. Let the floor breathe
Leave the spot uncovered for 24 hours. If the plant was trapping humidity underneath a pot or saucer, air may do more than a product can.
Avoid covering the mark with a rug, mat, furniture, or the same plant while you wait. That only traps moisture again.
3. Try a gentle surface clean only if it looks like residue
If the mark is dry, flat, and looks more like mineral crust, fertilizer residue, or dirt than a stain in the material, you can try a gentle cleaner.
Choose a pH-neutral wood floor cleaner category and read the label carefully. Look for wording that says it is safe for sealed wood or finished floors. Avoid heavy-duty degreasers, ammonia, bleach, acid-based removers, and anything that sounds like it is meant to strip buildup aggressively.
Apply a little cleaner to the cloth, not directly onto the floor. Test it first in a hidden spot, such as a closet corner or under a piece of furniture, and make sure it does not dull the finish before using it on the visible mark.
Before you buy
Check this before buying a cleaner or plant tray
- Floor type: If you cannot confirm the material, assume the finish is delicate and avoid aggressive cleaners.
- Mark type: A flat residue mark may clean up; a dark, swollen, peeling, or soft area is not a normal cleaning job.
- Plant setup: Match saucers, trays, mats, risers, and caddies to the pot diameter, weight, watering style, and floor-scratch risk.
| If you notice… | Try first | Do not start with |
|---|---|---|
| Light white haze under the pot | Dry microfiber, airflow, 24-hour wait | Heat, abrasive pads, vinegar |
| Flat crust or residue | Hidden-area test, then pH-neutral cleaner on a cloth | Pouring cleaner directly onto the floor |
| Dark stain | Document it and stop aggressive DIY | Bleach, peroxide, sanding, stain pens |
| Raised seams, bubbling, soft spots | Keep it dry and consider landlord/pro guidance | More water, rugs, heavy furniture cover-ups |
| Repeated moisture under the same pot | Waterproof saucer, riser, mat checks, better watering control | Putting the plant back exactly as it was |
When to stop DIY
If the stain is dark, the floor is swollen, the finish is peeling, the surface feels soft, or the area smells musty, stop treating it like a cleaning project.
For renters, this is where restraint matters. Take clear photos, stop the water source, keep the area dry, and avoid hiding damp material under a rug or heavy planter. A plain water mark is often easier to explain than a scratched, bleached, sanded, or badly colored patch around it.
Rebuild the plant setup so it does not happen again
Once the area is dry, do not put the same pot back in the same setup. Indoor plants need a little defense between wet soil and finished floors.
Use a real waterproof saucer or drip tray
The first layer is a saucer that actually holds water. Unglazed terracotta looks nice, but it is porous, so choose a drip tray wider than the pot base, with enough lip height for overflow and waterproof material such as glazed ceramic, thick plastic, or silicone.
Lift heavy plants with a riser, stand, or rolling caddy
The best prevention is airflow. When the pot is raised even a little, condensation is easier to spot and moisture can dry instead of sitting hidden against the floor.
For large plants, a rolling caddy helps you rotate, clean, and check underneath without dragging the planter. Look for load capacity, wheel locks, and a stable footprint.
Add felt pads where stands touch the floor
A plant stand solves one problem and can create another if its legs scratch the floor. Felt pads or floor protectors are cheap insurance.
Choose pads with decent thickness and strong adhesive, and replace them if they get wet, compressed, or gritty.
Use a waterproof plant mat carefully
A waterproof plant mat can help in a crowded plant corner, especially near a window. The tradeoff is that it can also trap water underneath, so lift the edges after watering day and check that the floor below stays dry.
Change the watering tool
A narrow-spout watering can or small watering funnel gives you more control than a drinking glass or wide pitcher. Look for a spout that reaches the soil, a capacity that suits your apartment, and a shape you can store easily.
Start small, then upgrade if the plant is heavy
For one small plant, you may only need a soft cloth, a proper saucer, and the habit of checking underneath after watering.
For a heavy indoor tree, a locking rolling caddy, wider tray, felt pads, and an occasional under-pot check are more useful than buying a stronger cleaner after damage appears.
If you are not sure where to spend first, buy prevention before repair. Floors are expensive. Saucers and risers are not.
What not to buy first
Do not start with heavy-duty floor restorers, stain pens, abrasive scrub pads, steam cleaners, or strong limescale removers. Be careful with any product that promises dramatic stain removal without asking what the floor is made of.
Frequently Asked Questions
How long should I wait before trying anything?
Give a light white haze at least 24 hours of airflow after removing the plant. If it improves, keep letting it dry. If the mark is dark, raised, soft, peeling, or musty, do not wait while adding more products; stop DIY and consider landlord or professional guidance.
Can I use a hair dryer on a plant-pot water ring?
Avoid high heat. If you are trying to encourage airflow, use cool or very low air from a distance and keep it moving. Do not blast heat into the finish. Heat can damage polyurethane, veneer, laminate, or vinyl surfaces.
Is engineered wood safer than hardwood around plants?
Not necessarily. Engineered wood still has a real wood veneer or a finished surface that can stain, cloud, or swell at seams. It may be less forgiving if water gets into the core layers.
Should I tell my landlord right away?
That depends on the severity and your lease situation. If the floor is swollen, soft, musty, or actively damp, it is usually better to document the issue and ask how they want it handled than to hide a moisture problem. Treat it as practical damage-control advice.
A quiet final take
Plants make a small apartment feel less static. They also put wet soil, drainage holes, condensation, and human forgetfulness on top of floors that were not designed to stay damp.
If you find a ring under a pot, the most useful move is not panic-cleaning. Dry it, look closely, avoid the harsh stuff, and know when the mark is beyond a surface wipe. Then rebuild the setup with a real saucer, airflow, and a habit of checking underneath.
A plant corner should not have to cost you a floor repair.