Disclosure: This post may contain affiliate links. If you buy through them, Useful Nook may earn a small commission at no extra cost to you.
From standing height, your bedroom can look entirely reasonable. The bed is made, the laundry is put away, and the floor is clear. Then you drop a phone charger, kneel down to retrieve it, and see the part of the room that has been quietly getting worse.
Under the bed is a gray strip of dust, loose hair, receipts, crumpled packaging, and maybe the sock you stopped looking for two weeks ago.
The tempting fix is to buy a set of under-bed storage bins and make the space feel useful. That can help later, but it is the wrong first step. Sliding a bin into a dusty space just turns the dust into something you have to work around next time.
Start by clearing and dusting the zone. Measure after that. Buy storage only if the clean space actually needs to hold something.
Quick answer
The short version
Clean under the bed before you buy storage. Use a light, pull out loose items, dry-dust first, clear the edges, then measure the real clearance under the frame.
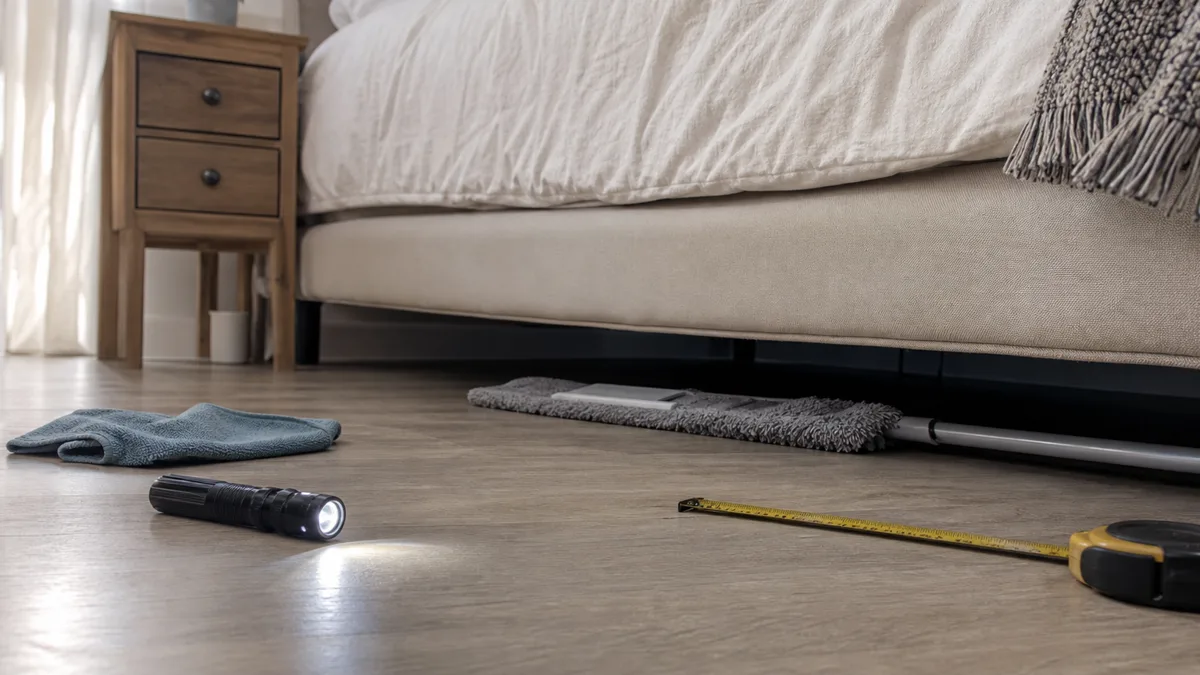
- Best first fix: Use a small flashlight and a low-profile microfiber duster before reaching for bins.
- Measure first: Check the lowest part of the frame, center support legs, and the path a bin has to slide through.
- Skip first: Giant rolling bins, wet mop pads, and bed risers before you know what the space actually needs.
Why storage bins should wait
Storage containers feel productive because they turn a messy space into a hidden one. But under a bed, hidden is not the same as solved.
If you slide a plastic bin over a dirty floor, the dust gets pushed into corners, carpet fibers, baseboards, and the back wall. The next time you want to clean, that bin becomes one more thing you have to drag out before you can reach the problem.
There is also a fit issue. Under-bed clearance is rarely as simple as the height from the floor to the side rail. A center support leg, a wooden lip, a metal crossbar, a rug edge, or wheels on the bin can make a container that looked right online jam halfway under the frame.
Clean the floor first. Once the area is empty, you may decide the best storage system is no storage at all.
Do the reset dry first
Do not start with a wet mop or a spray cleaner. Heavy bedroom dust mixed with moisture turns into a gray paste, and that paste is harder to lift from flooring than loose dust.
Start with visibility. Use a small LED flashlight or clip light and look from more than one side of the bed. Overhead bedroom lighting usually leaves the center in shadow, which is how old packaging, cords, and hair clumps get pushed around instead of removed.
If you see visible mold, water damage, pest droppings, urine, a sewage smell, soft flooring, or a damaged bed frame, stop the simple reset. That is no longer a basic dusting job. In a rental, contact the landlord; for damage or contamination concerns, bring in the appropriate professional instead of wiping and hoping.
Once the space looks like normal dust and clutter, pull out the large items by hand. Remove shoes, boxes, receipts, trash, and anything that belongs somewhere else. If there are already bins under the bed, take them all the way out of the room so you can see the floor.
Use a tool that actually fits under the frame
A regular upright vacuum is useful around the bed, but its head often cannot reach the middle. That is where a low-profile microfiber duster earns its space.
Look for a flat head, a long handle, and washable pads. Slide the duster under the frame and pull the dust toward the open room instead of pushing it deeper against the wall. Work from both sides if you can, especially with queen or king beds where the middle is easy to miss.
For bed legs, baseboards, and the gap between a headboard and wall, a bendable gap cleaning tool is more useful than a wide duster. The head is too narrow for the whole floor, but it can pull dust from tight corners that a vacuum attachment tends to bump past.
After that, expect a dust line around the bed. Use a dustpan and small hand brush, or your regular vacuum, to collect what you pulled out. That last edge cleanup is the difference between actually finishing and just moving the dust from one hiding place to another.
Before you buy
Check the real under-bed clearance
- Measure the lowest point: Measure from the floor to the lowest rail, center support, wheel, or frame lip, not just the prettiest open gap at the side.
- Match the tool to the floor: Felt sliders are usually safer for hard floors, while hard plastic sliders are meant for carpet. Avoid anything that could scratch a rental floor.
- Treat risers as optional: Bed risers need the right weight rating, leg fit, non-slip base, and stable frame. If the bed feels wobbly, remove them.
What each tool is actually for
A small under-bed kit should solve reach and visibility problems, not become another pile of cleaning gear.
A low-profile microfiber duster is the best first buy if your vacuum head cannot fit. Choose a washable pad so monthly maintenance does not depend on disposable refills. A telescoping handle helps if the bed is wide, but avoid flimsy handles that bend so much they lose pressure on the floor.
A bendable gap tool is for detail work: bed legs, wall edges, headboard gaps, and the thin strip along the baseboard. It should be soft enough not to scrape trim or finished floors.
A small flashlight sounds basic, but it prevents the most common mistake: blindly sweeping the same visible front edge while leaving the middle untouched. If the bed sits in a dark corner, a clip light can make the job feel much less annoying.
Under-bed storage bags or lidded bins come later. Soft zippered bags are better for blankets, seasonal clothes, and linens that need a little give. Hard lidded bins are better for shoes or sturdier items, but only if they fit around support legs and slide out without scraping the floor.
Compare the clearing options
| Tool or method | Best used for | What to check first |
|---|---|---|
| Standard vacuum | Open floor around the bed and the final dust line | Whether the head fits without scraping bed legs or baseboards |
| Low-profile microfiber duster | Pulling dry dust from deep under a low frame | Head height, handle length, and washable pad availability |
| Bendable gap tool | Baseboards, wall edges, headboard gaps, and bed legs | Soft edges that will not scratch trim or flooring |
| Under-bed storage bag | Blankets, seasonal clothes, and lighter fabric items | Clearance height, zipper quality, and whether the contents are clean and dry |
| Lidded hard bin | Shoes, books, or sturdier items that need structure | Exact height, center support legs, wheels, and floor protection |
| Bed risers | Creating extra clearance only when the frame is compatible | Weight rating, leg shape, stability, and floor protection |
Start-small, upgrade-later setup
Start-small setup: Use a flashlight, a low-profile microfiber duster, and a dustpan with a hand brush. That is enough for most neglected under-bed dust resets.
Better setup: Add a bendable gap tool for bed legs and baseboards, plus washable microfiber pads so monthly upkeep does not rely on disposable wipes.
Upgrade-later setup: Add lidded bins or zippered storage bags only after the floor is clean and measured. Consider furniture sliders only if you occasionally need to shift the bed and can do it without damaging the floor.
What not to buy first
Rolling storage bins: Wheels add height. A rolling bin can look perfect until it hits the frame rail or a center support leg.
Disposable wet mop pads: Wet pads are a poor first move when the dust is thick. Dry dust first, then do a light damp pass only if your floor type can handle it.
Bed risers: Extra clearance sounds helpful, but a wobbly bed is worse than a dusty floor. Risers are not a default fix for older frames, very heavy frames, beds with wheels, or narrow legs.
Robotic vacuums: A robot vacuum is a maintenance tool, not a rescue tool. If the under-bed space has cords, socks, packaging, or hard debris, it may get stuck before it cleans anything useful.
FAQ
How often should I clean under the bed?
After the first reset, a quick dry pass once a month is usually enough to keep the space manageable. If you have pets, carpet, or a very low frame, you may need to do it more often.
Why does the space under the bed get dusty so quickly?
Beds shed fibers from sheets, blankets, clothes, and everyday movement. Because the air under the bed does not circulate much, the dust settles and stays there until something pulls it out.
Can I use my regular vacuum attachment?
Yes, if it fits. A canister vacuum with a flat floor attachment or long wand can work well. Just avoid scraping the bed legs, baseboards, or floor with hard plastic edges.
Should I use a damp mop after dusting?
Only after dry dust and loose debris are gone, and only if your floor type allows it. The damp pass should be light. The goal is not to soak the area under the bed.
What if the middle support leg blocks storage?
Do not remove it. Most larger frames need that support. Use two narrower bags or bins on either side, or leave the center open so cleaning stays easier.
Final take
The goal is not to make the space under your bed feel like a showroom. It is to stop it from becoming a hidden junk drawer that collects dust every time you avoid looking at it.
Clear the loose items, remove the dust dry, and measure the space before buying anything. If the floor ends up clean and empty, that may be the best under-bed system of all.