Disclosure: This post may contain affiliate links. If you buy through these links, we may earn a commission at no extra cost to you.
You pull the sofa away from the wall, and there it is. The dust line. As the last boxes get taped shut and the final lamp goes into the car, the apartment looks surprisingly bare—and surprisingly dirty.
The bathroom sink rim always looks worse once the room is completely empty. Without toothbrushes or soap dispensers distracting the eye, the corners look rough. And the frustrating part hits right as you decide to do something about it: your heavy-duty rubber gloves, the good cleaning cloths, and the one useful scrub brush you actually like are already sealed in a box labeled “Kitchen Misc” at the bottom of a heavy stack.
You want to leave the space in decent shape, but you are physically exhausted. You do not want a cart full of fresh, specialized chemicals sitting on the counter two days before you hand over the keys. If you are looking ahead to unpacking, you might be thinking about a full first apartment cleaning starter kit, but the goal right now is a focused, practical reset.
Quick answer
The short version
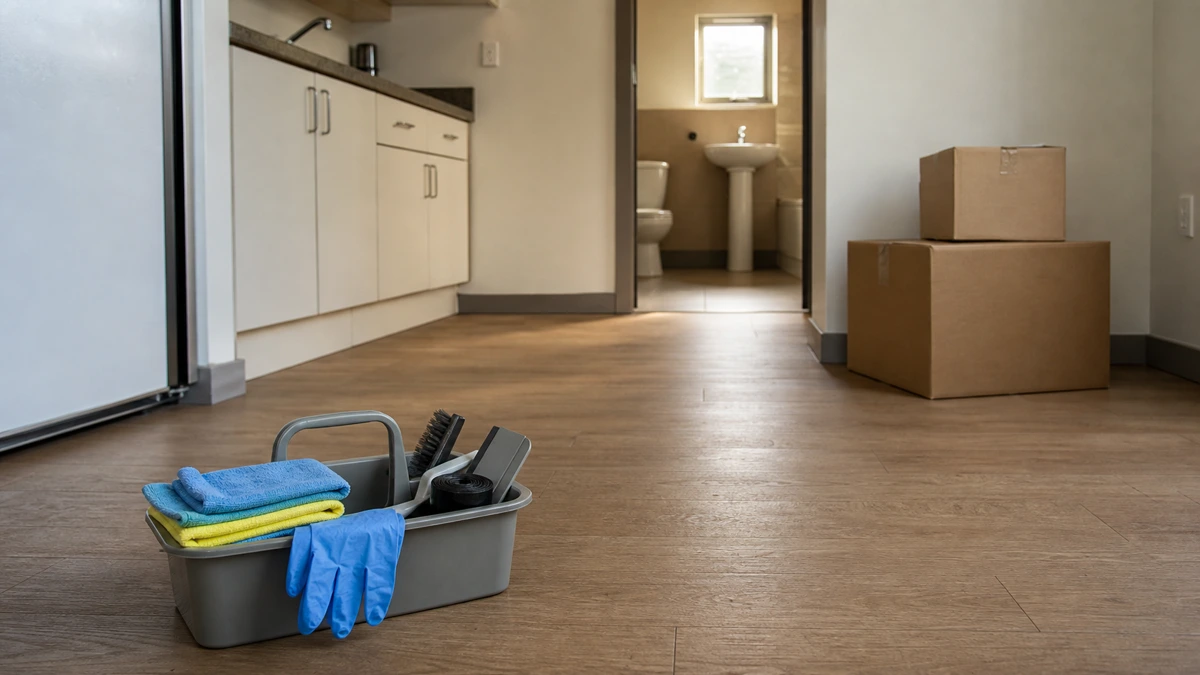
A last-minute move-out kit should fit inside a single small caddy or bucket. It focuses entirely on the final wipedown of an empty space. Instead of relying on harsh, specialized chemicals, it leans on specific physical tools: microfiber cloths for trapping dust, a plastic scraper for dried spills, a stiff crevice brush for edges, a spot-cleaning sponge for wall scuffs, an extendable duster for forgotten vents, heavy-duty trash bags for the final sweep, and disposable gloves. It is about tackling obvious visual friction efficiently, without digging through packed boxes.
The Reality of the Empty Apartment
Once the furniture leaves, a room changes. Taking down a large framed print reveals a faint dust shadow on the paint. Suddenly, the eye is no longer drawn to your decor; it is drawn to the sticker residue left on the window frame.
Tackling this requires restraint. The objective in the final 48 hours is to reduce obvious mess and leave the space reasonably clean. Your lease terms, local regulations, and your property manager’s specific standards dictate the exact baseline, along with any existing damage noted on your initial move-in report.
This is not the time to perform unauthorized repairs. It is also not the time to mix strong chemicals in an unventilated, empty room just to speed up the process. Physical tools often do the heavy lifting that basic sprays cannot, especially on caked-on dust. You are just trying to hand the keys back with a clear conscience.
Assessing the Empty Rooms
Before filling a bucket with soapy water, walk through the empty apartment with a notepad. It is tempting to start scrubbing the very first scuff mark you see, but taking ten minutes to triage the rooms will save hours of wasted effort.
Look for high-contrast dirt. Notice the dark grime packed into the white window tracks.
You are looking for visual friction. Property managers walking through a unit scan for broad, obvious issues. They check the general condition against the move-in report. Focus your kit on the areas that immediately stand out.
Building the Final 48-Hour Kit
Instead of running to the store in a panic and buying specialized sprays, build a small kit of physical tools.
The Small Caddy or Bucket
Keeping everything in one portable container prevents you from leaving a trail of wet rags across the empty apartment.
Check if it fits under the sink for filling. A caddy is easy to carry from room to room, and you can later repurpose it for small bathroom storage at your new place. A small plastic bucket also does the job and holds soapy water for floor spot-cleaning.
Microfiber Cloth Set
Paper towels leave lint. A small set of microfiber cloths is much more efficient for the final wipedown of faucets.
When looking at microfiber, check the washability. A practical trick is to fold the cloth in half, and then in half again. This gives you eight distinct sides to work with before you need a fresh cloth. Microfiber also works exceptionally well dry. When wiping out the inside of a lower cabinet, a dry microfiber cloth traps loose wood shavings faster than sweeping them out by hand.
Consider getting a set with at least two colors. Color separation lets you dedicate one color strictly to the bathroom and another to the kitchen.
Non-Scratch Scraper or Plastic Razor
If you used double-sided tape to hold down an area rug, taking it off often leaves a gummy residue. A plastic razor or non-scratch scraper is a much better tool for this than your fingernails.
Old adhesive is a common move-out annoyance. A plastic scraper gives you leverage without the destructive edge of a metal putty knife.
Plastic is generally safer than metal on standard apartment finishes. You still need to be careful. Painted walls, wood, stone, stainless steel, glossy finishes, and coated surfaces require hidden-area testing before applying any scraping tool. A little warm, soapy water can act as a lubricant.
Grout and Crevice Brush
A regular sponge is too blunt to get into the corners of a shower track. A narrow, stiff-bristled crevice brush handles these tight areas easily.
Kitchen sink rims are notorious for holding a line of brown grime right where the metal meets the counter. A crevice brush agitates this line quickly.
Look for bristles stiff enough to dislodge dried soap scum, but not so abrasive that they scratch standard acrylic tubs. If you uncover more severe plumbing odors once the bath mats are gone, our guide to bathroom drain smell and shower grime tools covers that specific problem.
Melamine Spot Sponge
Many renters rely on small, white foam sponges to erase marks from walls. They are extremely effective on scuffed baseboards.
However, melamine is essentially microscopic sandpaper. You must test this in an inconspicuous spot first. Melamine can take flat paint right off the drywall if you rub too hard. Use it sparingly, with very gentle pressure, and only on tiny marks that a regular wet cloth could not lift.
Extendable Duster
The ceiling fan blades are often ignored until moving week. Dragging a step stool around an empty apartment is tedious—and impossible if the stool is already packed.
When you turn a ceiling fan off for the last time, accumulated dust becomes a highly visible gray crust on the leading edge. An extendable duster allows you to pull that dust down without standing precariously on the edge of a kitchen counter.
Look for one with a washable head. Check the collapsed storage size; you want something that slides into a leftover moving box once the job is done.
Heavy-Duty Trash Bags and Disposable Gloves
You will generate a surprising amount of trash in the last few hours. Incredibly dirty disposable cloths need to go somewhere.
If you are cleaning out the refrigerator, tossing heavy, wet condiments into a thin plastic grocery bag is a recipe for a leak on the floor. Heavy-duty trash bags handle the weight, and they contain the smell.
Standard kitchen bags often rip when stuffed with rigid plastic. Keep a few heavy-duty bags on hand to avoid a messy tear on your way to the dumpster.
Pair these bags with a fresh set of disposable gloves. Check the glove material for allergies, opting for nitrile if latex is an issue. Having a fresh pair means you do not have to dig out your packed rubber gloves.
Before you buy
Check this first
Always read your lease before buying anything new. Some landlords strictly prohibit certain cleaners on hardwood floors or specific stone countertop materials. Never guess. Painted walls, wood, stone, stainless steel, glossy finishes, and coated surfaces require hidden-area testing before applying any tool or liquid. A hidden-area test is your best defense against causing accidental damage that could complicate your move-out process. For transparency on how we evaluate practical tools for these situations, read how we choose finds.
Start Small, Upgrade Later
You do not need a fully stocked janitorial cart for a two-day project. Start with the absolute minimum. A single plastic bucket, a basic pack of microfiber cloths, dish soap, an old toothbrush, and whatever standard trash bags you have left covers the vast majority of an empty apartment wipe-down.
Only add specialized tools as needed. Grab a plastic scraper if you have extensive tape residue. Keep specialized stainless steel polishes, heavy-duty oven strippers, and specific stone cleaners off your list until you unpack at the new place, unless your current lease explicitly requires them.
What Not to Buy First
Do not buy massive, industrial-sized jugs of cleaners or giant value packs of fifty sponges. Buying bulk supplies now just creates more heavy liquid you have to transport to your next home.
Avoid grabbing metal paint scrapers. They look highly effective, but they easily gouge plastic window frames. A plastic scraper is much safer for general use around a rental.
Skip the giant rolls of paper towels. They leave lint on dark counters, glass, and mirrors. Microfiber grabs dry dust much better. Using reusable cloths also reduces the amount of bulky trash you have to haul to the dumpster.
| Cleaning Tool | Best For | Risk Factor |
|---|---|---|
| Microfiber Cloths | Trapping dry dust, streak-free glass and mirror wiping | Cross-contamination if used in both bathroom and kitchen without washing |
| Plastic Scraper | Popping off dried food in fridges, lifting old tape residue | Can still scuff glossy finishes or coated cabinets; test first |
| Crevice Brush | Shower tracks, sink rims, window sill dirt | Stiff bristles can scratch soft acrylic or fiberglass tubs |
| Melamine Sponge | Wall scuffs, baseboard marks, light switch plates | Acts like fine sandpaper; will dull paint, wood, and stone finishes |
| Extendable Duster | Ceiling fans, high corners, exhaust vents | Flimsy handles can snap if pushed too hard into tight corners |
The Practical Order of Operations
When you are exhausted from carrying boxes, efficiency matters. A chaotic approach usually means cleaning the same surface twice.
Start high and work low. Grab the extendable duster first. Hit the ceiling fan blades. Let the dust fall to the floor.
Clear the dry debris before introducing moisture. Sweep or vacuum the floors before you start using wet cloths.
Use gentle tools before harsher products. Try warm water and a damp microfiber cloth first. If that fails, move to a mild dish soap. Only bring out the heavy-duty scrubbers or scrapers if the gentle approach does not work.
Address the highly visible zones first. Focus your remaining energy on the kitchen and the bathroom. Wipe down the inside of the fridge, the stovetop, and the bathroom fixtures.
Frequently Asked Questions
Will using these tools guarantee I get my security deposit back?
No. Security deposit returns depend heavily on the specific terms of your lease, local tenancy laws, the existing damage noted when you moved in, and the specific standards of your property manager. These tools help you present a reasonably clean space. They cannot guarantee an approved inspection, reverse actual damage, or repair structural wear.
Should I try to patch holes in the wall myself?
This depends entirely on your lease and local rules. Some leases explicitly forbid renters from performing unauthorized drywall repairs. When in doubt, it is often better to leave small nail holes alone rather than risking a messy repair that draws more attention.
Can I mix different cleaners to make the job go faster?
Never. Mixing household cleaning products can create highly dangerous, toxic fumes. Stick to using one product at a time and always keep the apartment well-ventilated.
Should I leave leftover cleaning supplies for the next tenant?
Usually, no. Property managers generally require the apartment to be completely empty. Leftover bottles under the sink are often viewed as abandoned property or trash. Pack them up or dispose of them properly.
Final Take
The final walkthrough does not have to be a high-anxiety event. By the time the furniture is gone, the hard part of moving is mostly over.
Instead of stressing over every microscopic flaw in an empty room, focus on the obvious friction points. A damp cloth on a dusty baseboard goes a long way in showing that the space was maintained. Pack your small caddy, tackle the visible layers, test your surfaces carefully, hand over the keys, and go unpack at your new place.