Disclosure: This post may contain affiliate links. If you buy through these links, we may earn a commission at no extra cost to you.
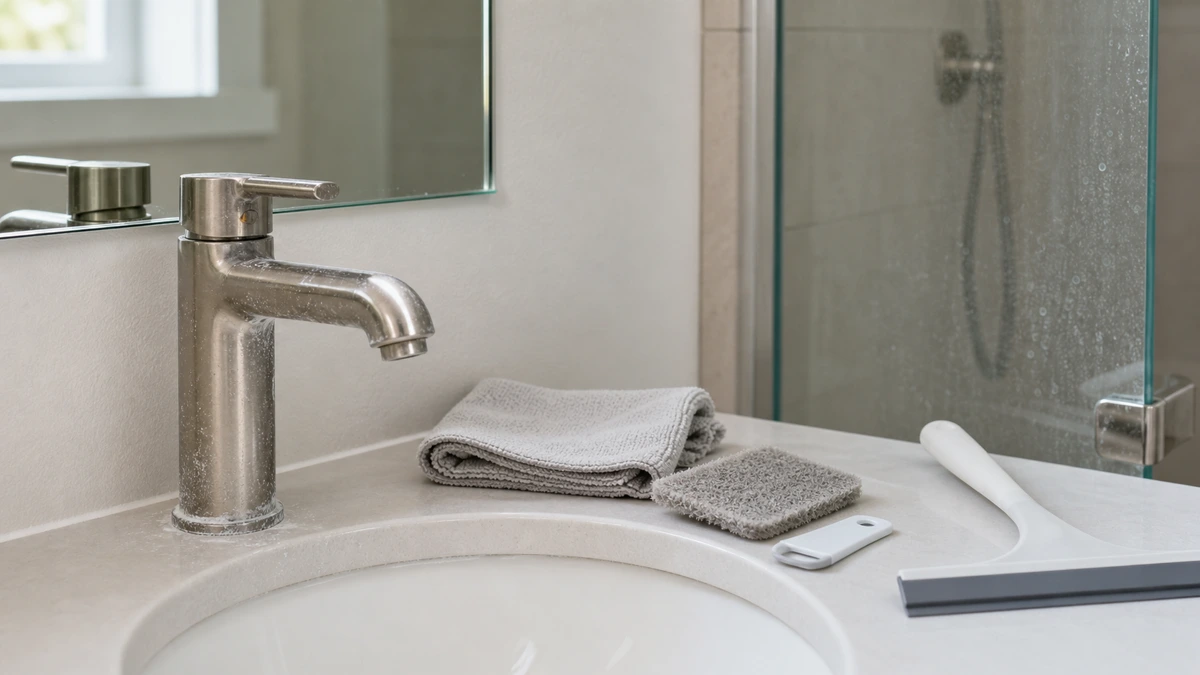
If hard water stains keep coming back on your faucet, the safest first step is not stronger acid or more scrubbing. This guide shows how to remove hard water stains from faucets while reducing the risk of damaging chrome, brushed nickel, black, brass, or other delicate finishes.
Related practical guides: streaky shower glass after cleaning, bathroom drain smell and shower grime tools, small bathroom storage for renters.
Shower glass does the same thing: clear from across the room, hazy the second the light hits it from the side.
This is where nearly every cleaning tip points to white vinegar. But if the faucet finish looks thin, coated, or worn at the base, that hesitation is useful. In a rental bathroom, one aggressive cleaning choice can turn a temporary mineral stain into a permanent finish problem.
Hard-water stains frustrate. Damaging the fixture is worse.
Quick answer
The short version
The safest first move is to identify the surface, wipe and dry with microfiber, test any pad or cleaner in a hidden spot, and save stronger hard-water removers for surfaces their label actually allows.
- Best first fix: Use a soft microfiber cloth and dry the area completely before reaching for acid or abrasives.
- Check first: Find out whether the fixture is chrome, nickel, brass, coated metal, acrylic, glass, or stone-adjacent.
- Skip first: Do not make vinegar, metal blades, harsh pads, or mystery limescale removers your first move on an unknown finish.
Why hard-water stains are easy to misread
Hard-water stains look like ordinary grime, so the natural reaction is to scrub harder. That is usually the wrong instinct.
These cloudy marks are mineral deposits left behind when water evaporates. Soap may not remove them because the problem is not just surface dirt. A stronger sponge can push residue around while slowly dulling the finish underneath.
That is why people get stuck in a loop: wipe, wait, see the haze return, scrub harder, then wonder why the faucet looks worse.
The issue is not effort. The tool has to match the surface.
Check the surface before choosing the cleaner
A faucet that looks like solid metal may be plated, coated, or plastic with a metallic finish. A vanity top may be natural stone. A shower panel may be glass, coated glass, acrylic, or framed with a finish that reacts badly to acid.
That matters because vinegar, citric acid, and many limescale removers can dissolve mineral buildup while also dulling stone, discoloring some metals, or weakening a protective coating if they sit too long.
Chrome and stainless steel are usually more forgiving, but brushed nickel, bronze, brass, matte black, coated finishes, acrylic, and stone deserve more caution.
If you do not know what the surface is, assume it is delicate. Check manufacturer guidance if you can. If you are renting, ask before using a strong remover on a worn fixture.
I would not make vinegar the first move on an unknown finish.
Start with the lowest-risk tools
The least dramatic tool is often the one that prevents the most damage: a soft microfiber cloth.
For fresh water spots, use a damp microfiber cloth first, then follow with a dry one. The dry step matters. If droplets are left behind, the minerals stay behind too.
A good microfiber cloth set is useful because you can keep separate cloths for glass, faucets, counters, and less clean areas. Look for cloths that are soft, washable, absorbent, and finished with edges that do not feel rough. Color separation helps if you want bathroom glass cloths kept away from sink or toilet-area cloths.
This is not exciting, but it is the habit that keeps mineral spots from becoming a bigger project.
When a pad or plastic scraper makes sense
If the cloth does not move the buildup, the next step is gentle friction, not maximum force.
A non-scratch scrub pad can help with the mineral ring around the faucet base or light haze near the lower part of a shower door. But “non-scratch” is not a magic promise. Test the pad on the back of the fixture, a bottom corner, or another hidden area before using it where the light will show every mark.
Avoid heavy green scouring pads, steel wool, drill brushes, and anything that feels like it belongs on a grill. A bathroom fixture is not cast iron.
For plain shower glass or smooth tile, a plastic scraper can sometimes lift thicker residue with less risk than a metal blade. Still, avoid it on unknown coated glass, acrylic, fiberglass, frosted glass, or delicate frames without testing first. Look for a comfortable grip and replaceable plastic blades, since a dull edge makes you press harder.
Metal razor blades and metal scrapers are not good routine tools for this job. One bad angle can leave a scratch that no cleaner will remove.
What to do around faucet tips and aerators
Hard-water buildup often collects at the faucet tip, where the water comes out. If the stream is weak, splitting sideways, or spraying oddly, the aerator may be partly blocked with mineral deposits.
Do not attack the visible faucet finish with pliers first. Many modern faucets use recessed aerators that need a small key. A faucet aerator brush and key set can help remove the aerator more cleanly, as long as you check the fit before forcing anything.
Look for a set with multiple key sizes and small brushes. The goal is to clean the removable screen and threads, not scrape the outside of the faucet. If the aerator comes out safely, you can clean that small part separately and keep stronger cleaners away from the visible finish.
If the aerator will not move, stop before you gouge the metal. A stuck part is cheaper to ask about than a scratched faucet body.
Prevention works better than buying a stronger bottle
If stains return the day after you clean, the problem is not that your last cleaner was weak. The water is still drying on the surface.
A squeegee is not a miracle remover. It is a prevention tool. Running it over shower glass after use takes a few seconds and removes the droplets before they leave mineral spots behind.
For small bathrooms and rentals, storage matters. A squeegee that has nowhere to live will end up under the sink. Look for a decent blade, compact shape, and no-drill hanging option.
A small cleaning caddy also helps if it has drainage holes and fits under the sink. Keep the microfiber cloth, gentle pad, gloves, and squeegee close enough that the routine does not feel like a project.
When to move to a stronger hard-water remover
A surface-safe hard-water remover should be the later step, not the first step.
Use one only after you know the surface, have tried low-risk wiping, and have tested a friction tool in a hidden area. Then read the label. The product should explicitly allow the surface.
If the label says not to use it on natural stone, nickel, brass, painted surfaces, or certain coatings, believe the label.
Use ventilation, wear gloves if needed, and follow the contact time. Leaving a cleaner on longer than instructed just gives it more time to damage the wrong material.
And do not mix cleaners. If bleach, ammonia-based cleaner, or another bathroom product was used recently, rinse thoroughly and give the area time before applying an acidic hard-water remover.
Before you buy
Check this first
- Surface compatibility: Match the cleaner or tool to the actual surface, not just the stain.
- Pad texture: If a pad feels close to steel wool, it is too aggressive for most bathroom fixtures.
- Hidden-area test: Test pads, scrapers, and liquids where a small mark will not be obvious.
- Renter storage: Choose no-drill hooks, compact caddies, and tools that reduce the risk of tile or paint damage.
- Ventilation: Do not buy a strong remover if your bathroom has no realistic way to air out.
- Chemical safety: Never mix cleaners, and do not layer a descaler over recent bleach or ammonia residue.
| If you notice… | Try first | Why it helps |
|---|---|---|
| Faucet looks cloudy after wiping | Microfiber dry wipe, then a gentle pad only after testing | Fresh mineral film may lift without acid or heavy abrasion |
| Shower glass has stubborn haze | Squeegee prevention, glass-safe cleaner, plastic scraper only with caution | Glass needs water control as much as stain removal |
| Water stream is weak or spraying sideways | Aerator brush/key set after checking the aerator style | The buildup may be inside the removable screen, not just on the faucet body |
| Surface is stone, brass, nickel, coated, or unknown | Stop and check label, manufacturer guidance, or landlord guidance | The wrong acid or pad can leave permanent damage |
| Stains keep returning every week | Drying routine, squeegee, and easier tool storage | Prevention matters more than repeatedly buying stronger cleaners |
Start small, upgrade later
Keep the buying logic scaled to the actual problem.
Start with microfiber cloths and a squeegee. Those two tools handle fresh spots and prevent many new ones.
Add only if needed: a clearly labeled non-scratch pad, a faucet aerator brush/key set, or a plastic scraper for suitable flat surfaces. Test each one before using it in the visible area.
Upgrade carefully: a surface-safe hard-water remover may be useful for old glass haze or standard chrome that gentle methods cannot handle. But it should match the label, the surface, and the ventilation you actually have.
What not to buy or use first
Do not start with a harsh acid cleaner as a universal bathroom fix. Do not use metal scrapers or razor blades as routine hard-water tools. Do not grab mystery abrasive pads with no surface guidance.
Oversized drill-brush kits are usually too much for a small rental bathroom. Heavily scented all-purpose cleaners are not the answer either. Fragrance does not dissolve mineral buildup.
The goal is not to own the strongest cleaner. The goal is to avoid making the surface worse.
Frequently Asked Questions
Is vinegar safe for hard-water stains on faucets?
Sometimes, but not always. Vinegar is an acid. It can dissolve mineral deposits on some durable surfaces, but it can also dull stone, damage coatings, or discolor some metal finishes. On an unknown faucet finish, test first or choose a lower-risk method.
What should I try before a hard-water remover?
Try a damp microfiber wipe followed by a dry microfiber buff. If spots remain, use mild soap and a clearly labeled non-scratch pad in a hidden test area. For shower glass, start using a squeegee so new spots do not build up while you deal with the old ones.
Can I use a magic eraser or abrasive pad?
Be careful. Melamine sponges and abrasive pads can act like very fine sandpaper. They may dull shiny finishes, micro-scratch acrylic, or remove protective coatings. If you use any friction tool, test it somewhere hidden first and stop if the surface looks duller.
Why do hard-water stains come back so quickly?
The minerals are in the water. Every time droplets dry on the faucet or glass, they leave a little residue behind. Unless you soften the water, the practical fix is to remove the droplets before they evaporate: dry the faucet and squeegee the glass.
What if I already damaged the finish?
If acid or abrasion stripped a coating, dulled metal, or scratched the surface, more cleaner will not reverse it. Check the manufacturer guidance if you know the fixture brand. In a rental, document the issue and ask before trying more aggressive repair methods.
Is hard-water buildup the same as mold?
No. Hard-water buildup is mineral residue, usually white, cloudy, chalky, or crusty. Mold is biological growth and may appear dark, pink, or fuzzy. If you see visible mold, damaged material, a leak, or a recurring plumbing smell, stop treating it like a simple hard-water stain and check with the landlord or a qualified professional.
The final take
Hard-water stains make you want to reach for the strongest bottle in the cabinet. That is understandable, but it is not always the safest order.
If you do not know what the surface is made of, slow down. Use a soft cloth, dry the area, test in a hidden spot, and build a prevention habit before escalating to stronger cleaners. The right first tool is often boring. That is exactly why it is less likely to ruin the finish.